.svg)
Walkthrough of how to get Shopify accounting automation up and running with Bookkeep.
To start taking advantage of Bookkeep's automated journal entries for Shopify, the first step is to establish a connection with the Shopify store from which you want to import data. In the following detailed guide, we will walk you through the setup process to ensure that you are well-prepared to begin using this feature effectively.
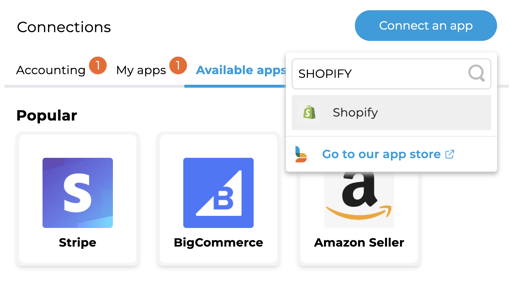
1. First connect your Shopify store by visiting the Connections/Available apps View and clicking Add an App (top right) to locate Shopify:
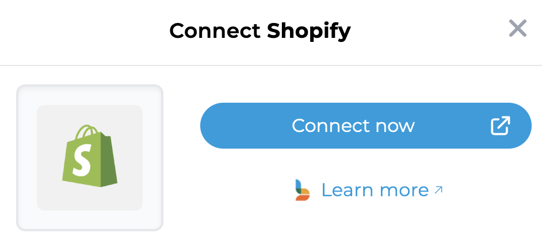
2. Clicking on Shopify above will generate a pop-up connection window. After clicking "Connect now", you will see a new window appear where you must enter the myshopify domain for that store you wish to connect.
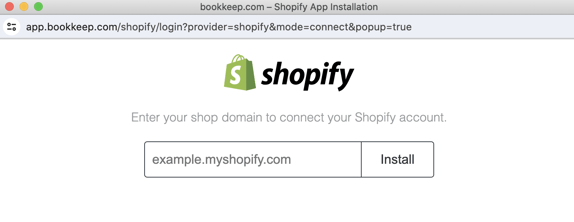
Below is the window where you enter the myshopify domain:
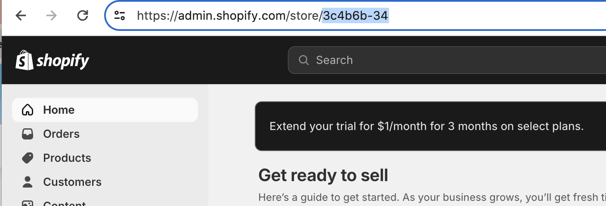
This domain can be located when logged into the Shopify admin dashboard by viewing the URL as shown below (the ending part highlighted would translate to the following domain to connect: 3c4b6b-34.myshopify.com):
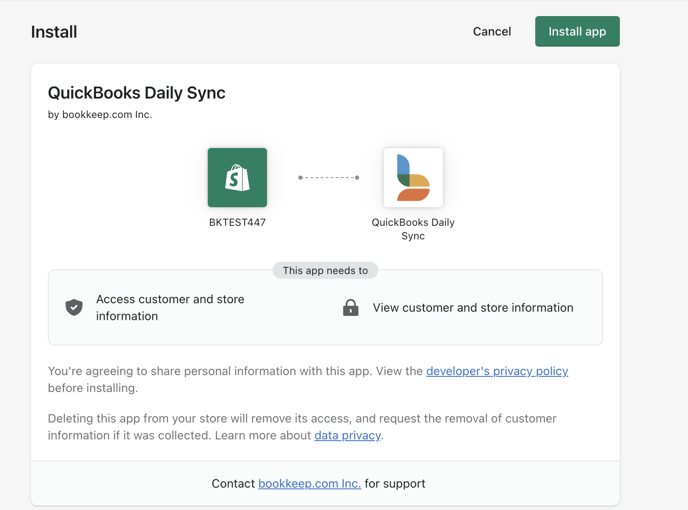
3. Once you enter the myshopify domain, you will then install our application by clicking "Install app" as shown below:
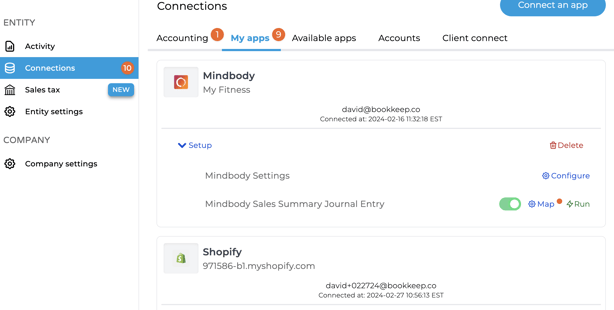
4. Once this is completed, the Shopify app connection will be accessible on the Connections/My apps view as shown below:
5. Once you have successfully connected your Shopify store to Bookkeep, the next step is to map the data from your store to the appropriate accounts in your Accounting Platform, such as QuickBooks Online.
To begin mapping, navigate to the app connection and click "Setup" to expand the section with links to "Map" as shown below. It's important to note that this mapping can only be completed once you have successfully connected an accounting platform to Bookkeep. By setting up this mapping correctly, you can ensure that your financial data is accurately recorded and categorized in your accounting system, providing you with clear and organized financial records for your business.
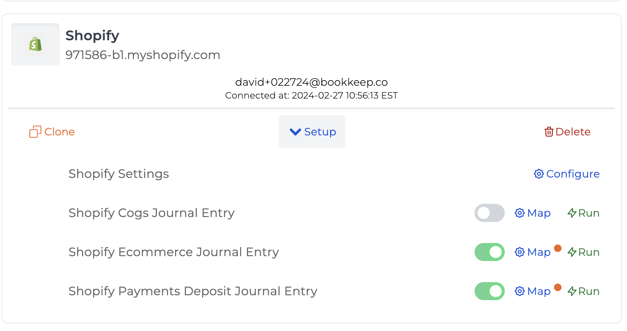
OPTIONAL: One unique feature Bookkeep offers for Shopify is called "Cloning" activated by clicking "Clone" in the image below. When clicking "Clone" you will see your Shopify connection "copy" itself as shown below (we will dig into what Cloning enables for you below):
 6. This step is relevant for those who clicked "Clone" in the step above: Cloning is not required and is an optional feature which enables advanced reporting and filtering by sales channels.
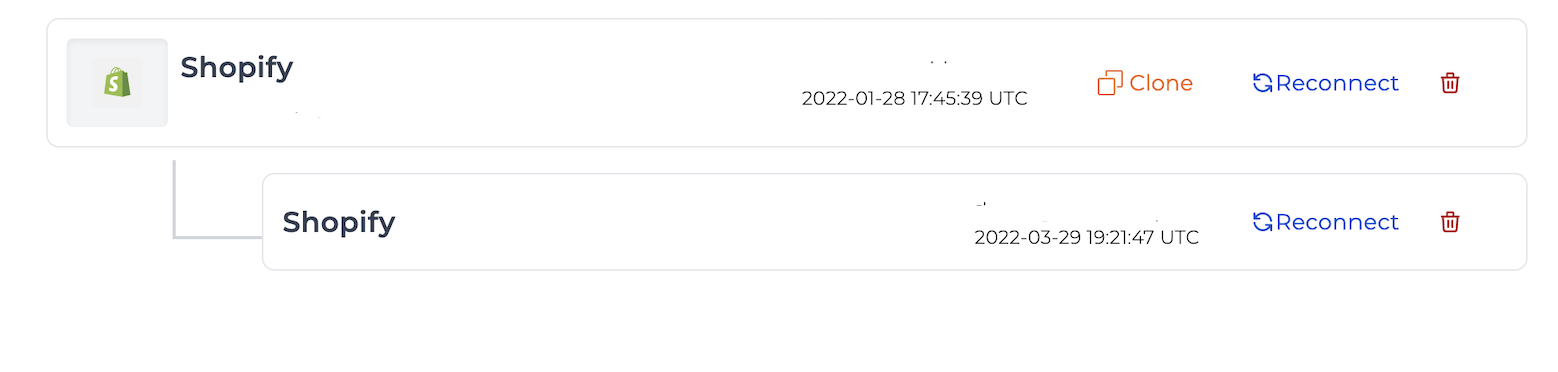
Some customers like to use this in order to break out the Shopify channels into separate journal entries for COGS and sales. If you choose to not break out your journal entries by separate channels you can skip clicking "Clone" and continue mapping as further discussed below. Cloning can be repeated if you have more channels you would like to post separately. If you choose to Clone your Shopify connection, you will see the following journal entry options below:
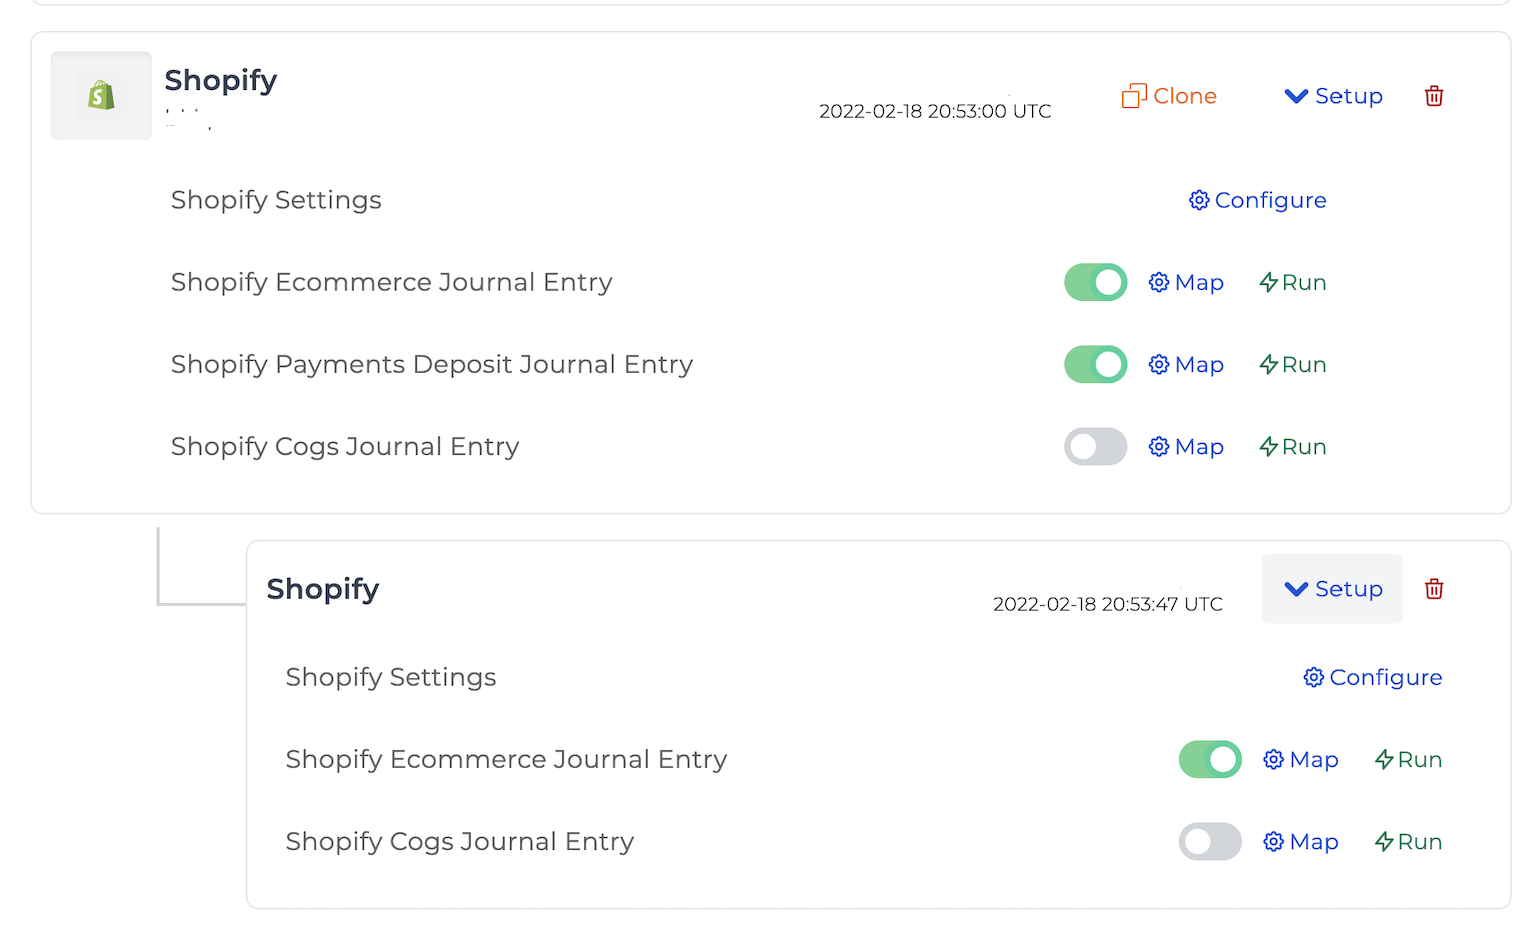
**A note on Cloned Shopify connections: as you will see in the image above the copied Clone at the bottom only shows an ecommerce and COGS journal entry option, while the parent at the top shows ecommerce, payments deposit, and COGS journal entries. This is important to understand that the cloning option allows you to breakout specific channels to be posted as separate journal entries related only to cost of goods and sales. However, the payouts from Shopify are not channel specific, and therefore are only mapped once at the top level.
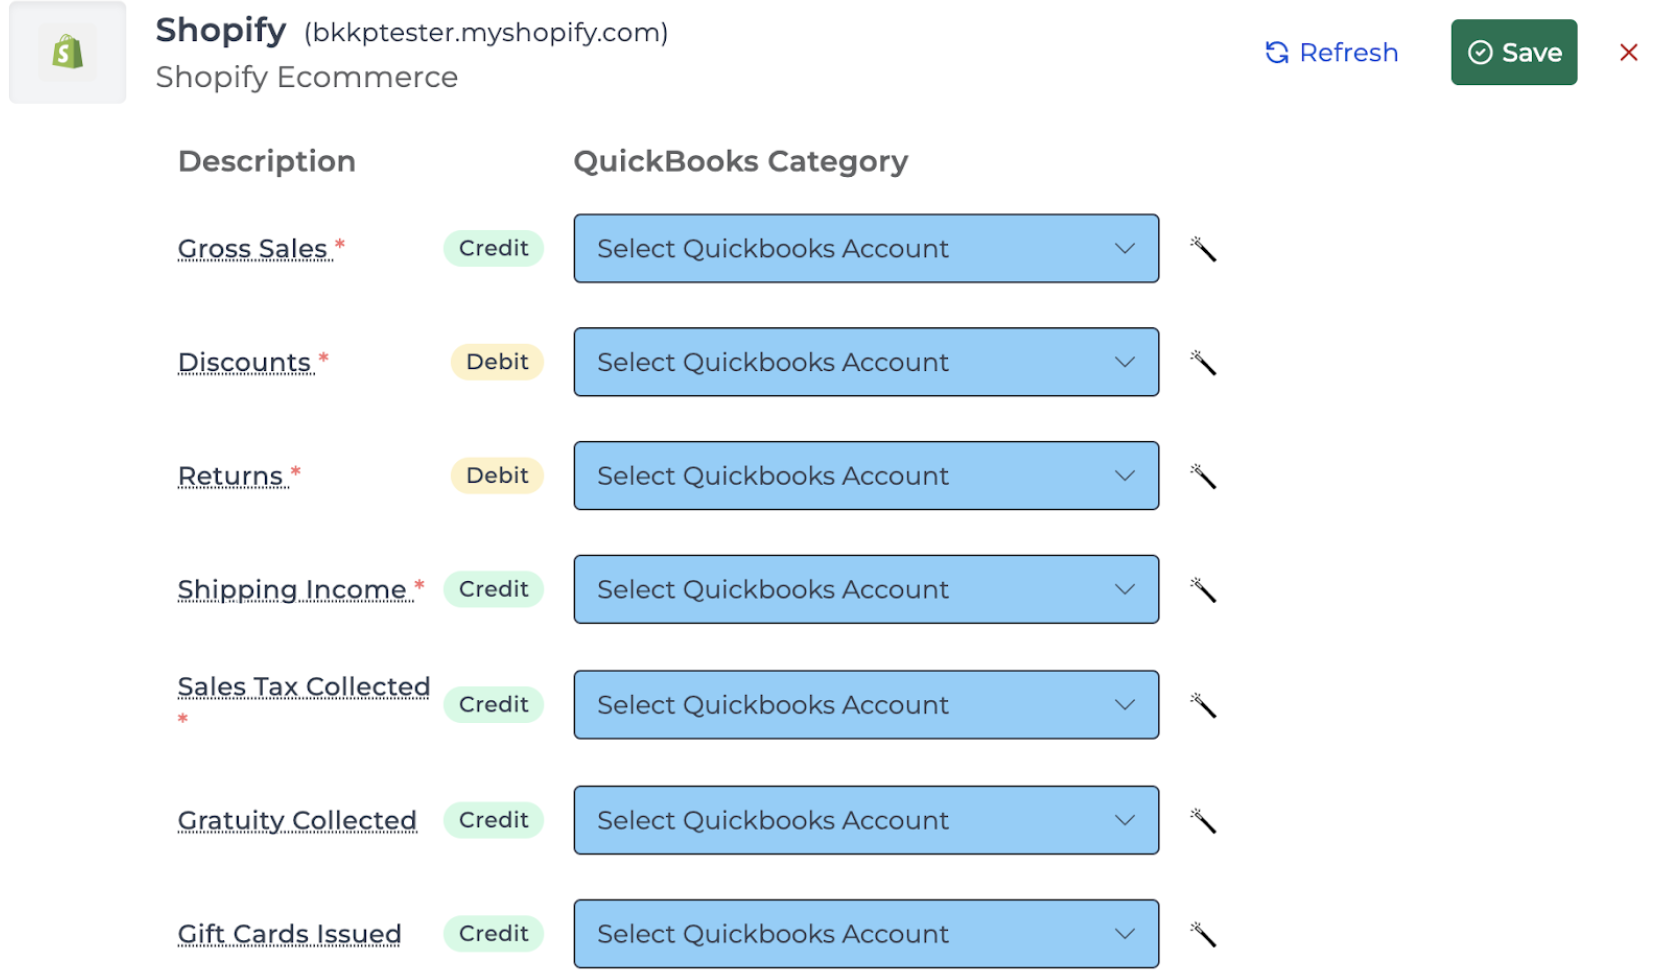
7. Shopify Ecommerce journal entry mapping: This journal entry consolidates the sales completed on the previous day into a single summary entry for that day. When setting up this mapping at the parent level (not the clone level), you will need to click on "Configure" and then "Map" to select the specific accounts in your accounting platform that will receive data from Shopify. You can repeat this process for the COGS and deposits journal entries if you decide to utilize them.
8. After completing the necessary mappings to automate your Shopify accounting, you can set the journal entry to ON (indicated by the slider shown with the color GREEN below and GRAY indicates the automation is OFF) which will begin posting a daily journal entry starting on the next day. As indicated in the image below, I have cloned my connection to allow breaking out specific channels from Shopify into their own journal entry. Also shown in the image below, I have the ecommerce ON for both the parent and the clone. By having both the parent and clone on for ecommerce sales, I will post one journal entry for the filtered channels I selected for the clone. Any channels not selected for the clone would post at the parent level mapping (this ensures no data is duplicated). I have the payments deposit on at the parent as deposits are not channel specific. Additionally, I do not have the COGS journal entry on for either the parent or clone.
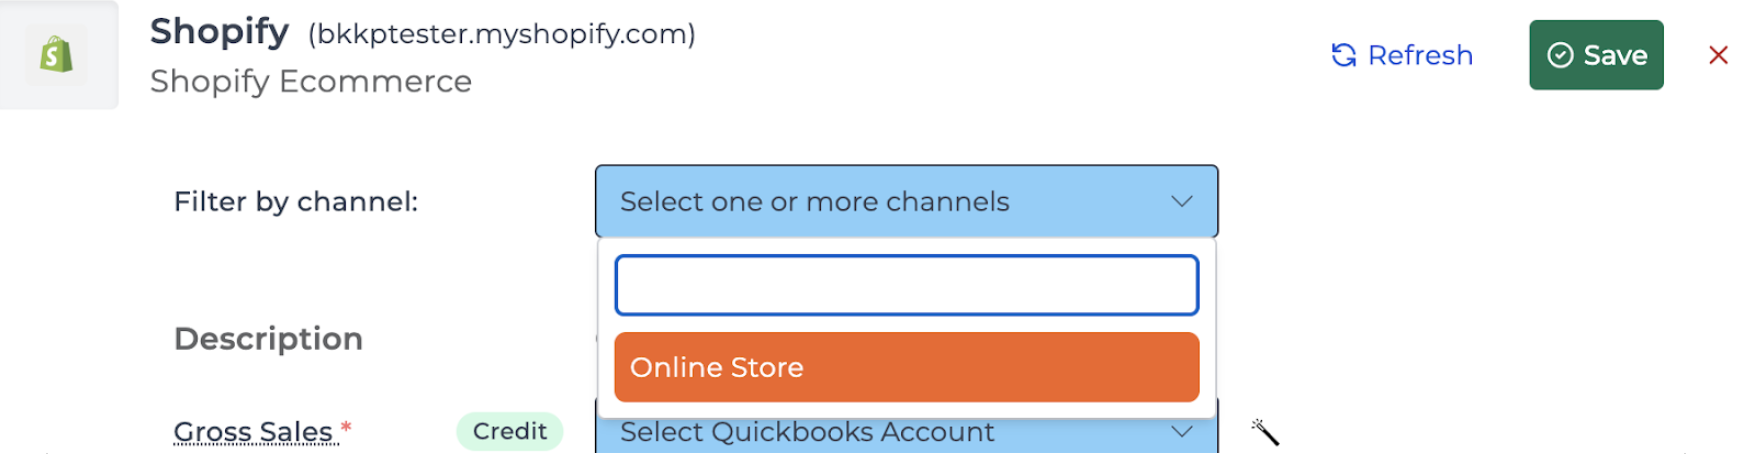
9. This step is relevant for those who clicked "Clone" which was discussed above: when completing the mappings at the Clone level, you will notice a dropdown at the top of the mapping view to "Filter by Channel." This will allow you to select one or multiple channels that you would like to come in for this journal entry. You can have as many clones as you would like to be able to post channels separately:
10. Once you have mapped the necessary journal entry templates and set them to ON, you are good to go! You will see journal entries begin posting to your accounting platform the next day! If you have any questions, please contact support@bookkeep.com.