.svg)
How to connect apps to Bookkeep for accounting automation
Now that you have created your Bookkeep account and first entity, you can start connecting your ecommerce and POS apps to begin reviewing/posting the data to your accounting platform.
1. Choose the entity you would like to connect a new ecommerce or POS app to using the entity dropdown shown below: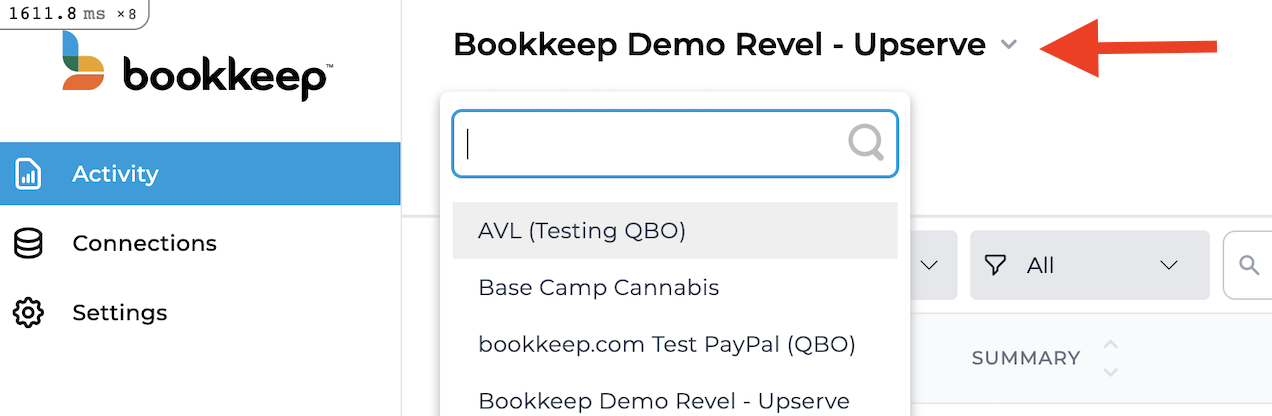
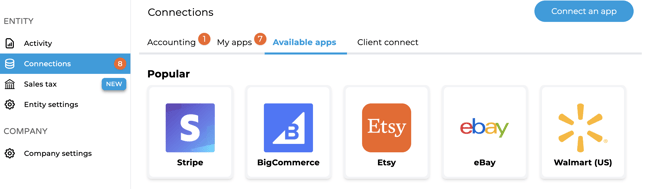
2. After choosing the appropriate entity, click on “Connections” from the left navigation as shown below:

3. Once on the Connections view, you can either visit the "Available apps" tab shown below or click the "Connect an app" button shown at the top right of the image below to locate your app to connect:
4. Click on the appropriate icon for the app you wish to connect and you will be presented with the options to connect a particular app as shown below:
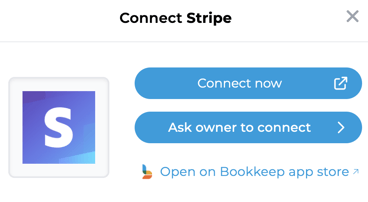
- “Connect Now” is the option to utilize if you have owner/admin level credentials to approve the connection to your Bookkeep account.
- “Ask Owner to Connect” is the option to use if you do not have the owner/admin level credentials for that specific app. You can use this feature to send the owner an email invitation to connect the account to Bookkeep. You will have to provide the email address for which the invite will be sent as shown below:
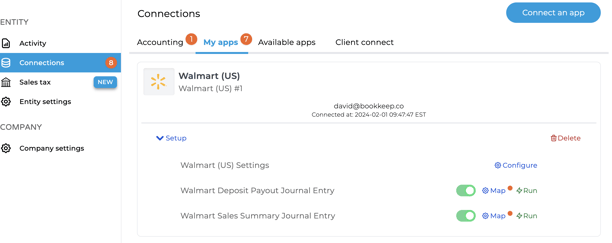
5. Once the app is connected successfully, you will see it listed on your "My apps" tab of the Connections page as shown below. Upon app connection, Bookkeep will begin syncing the shorter of 14 days or month to date (the last 14 days are free within the trial period). This enables populating data in your Activity view for you to review. Additionally, we have found many customers to start using Bookkeep at the start of the month.
You can repeat the above process in order to connect all the apps that your entity needs.
Note: It would be a good idea to make sure you understand which apps your entity utilizes in order to make the right decisions around which of our available apps to connect.
For example, your entity may use Shopify and Amazon Seller for sales and accepts multiple types of payments: PayPal, Stripe, and Amazon Pay. In this case, you might want to use our Shopify and Amazon Seller apps to capture the sales and payouts made by Shopify and Amazon, but also the PayPal and Stripe apps to capture the fees and payouts from those payment processors.
These decisions can get more complex as the use of multiple ecommerce and payment platforms becomes more widespread. It is important to understand to avoid any duplications in your accounting platform (double booking of sales or payouts). This is especially true as different sales channels can also be combined or integrated with each other. For example, if the above entity has the Amazon sales also integrated into Shopify, this can result in overstated sales. But don’t worry, we are here to help you navigate these murky waters. Feel free to contact support@bookkeep.com.