.svg)
Here we cover the minimum elements to get your account up and running with Bookkeep.
Here we cover the steps for getting started with Bookkeep sync to enable financial data flow from your retail and ecommerce apps to your accounting platform. If you would like to see an interactive demo on setting up your automation, visit here.
Otherwise, below we cover the basic elements to getting up and running with Bookkeep.
- Create your account on our sign up page. There will be a series of steps to gather information to ensure we set up your account correctly. As a part of signup, you will need to verify your email address. This provides an extra layer of security for your account.
- As a part of the initial setup, you will be creating your company. A company is the central point for managing users and entities. A company can have many entities where the entities are the spot for connecting an accounting platform and various retail and ecommerce apps. You can invite users to your company and give them specific roles to control their permission levels as well as the entities they have access to.
- A company also is the central point for managing billing. A company can have all entities that belong to it on one payment method, or a company can allow each entity to have its own payment method.
- After completing the initial setup steps, you will create your first entity in the setup as shown below.
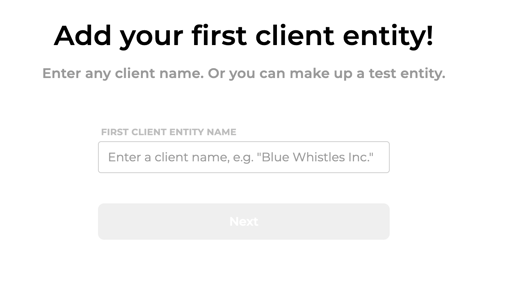
- An entity is where you will be connecting your apps and accounting platform to enable data sync from your apps to your accounting platform.
- An entity can only have 1 accounting platform connected e.g. Quickbooks, Xero, Zoho. Mappings are completed to your accounting platform accounts to sync the data from your apps e.g. Shopify to your accounting platform e.g. QuickBooks.
- After completing signup, you will have your first entity to connect your accounting platform and apps to enable financial data sync.
- After the entity is created, you will be prompted to connect your accounting platform as shown below:
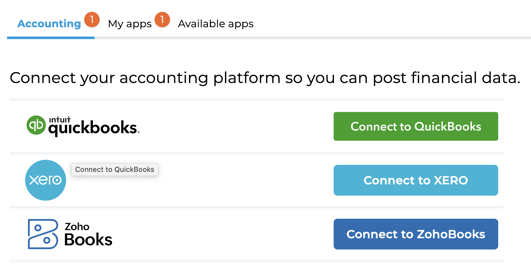
- After connecting your accounting platform e.g. Xero, you will need to connect your retail and ecommerce apps. These are sources of financial data that will sync to accounting daily e.g. Shopify sales data, Sezzle fees, Etsy sales, Shopify deposits, etc.
- If at anytime you need to connect more apps you can do so by navigating to the "Available apps" tab.
- Each app connection offers different financial data that can be synced to your accounting platform. For example, Shopify offers the syncing of sales and payments data as well as cost of goods and payout data.
- Each app connection has different methods of connecting. For example, some apps require you to login with owner or admin credentials while others require you to retrieve an API key from that app's dashboard.
- If you wish to preview data in Bookkeep: Once you have connected your apps, you can choose to import days to review the data.
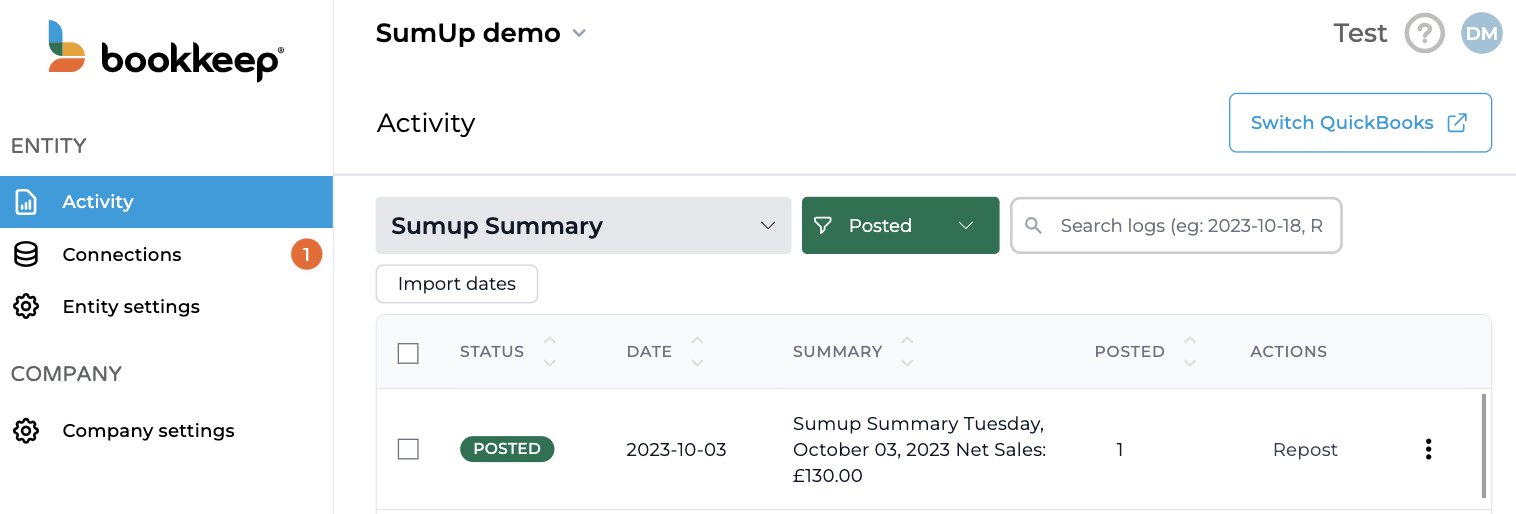
- On the Activity view (which can be located on the left navigation), you can import data using our "Import dates" feature after selecting a specific journal entry to sync e.g. below Shopify Ecommerce is chosen:
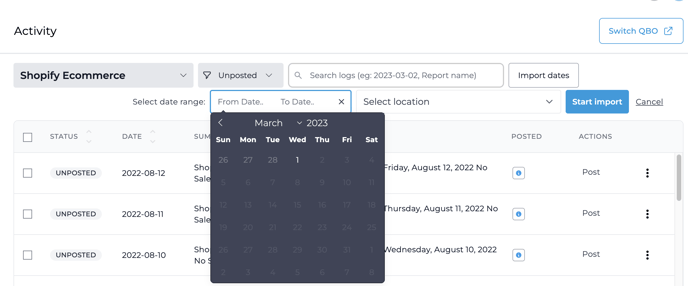
- You will need to select the date range and a location (if there are multiple locations) and then click "start import." The data will not show up right away as the data has to be fetched from your source app and can take a few minutes.
- As data is imported, you will see the entries appearing in the Activity view. They will not post to accounting until the required lines have been mapped to accounts from your accounting platform.
- On the Activity view (which can be located on the left navigation), you can import data using our "Import dates" feature after selecting a specific journal entry to sync e.g. below Shopify Ecommerce is chosen:
- Once you have connected your retail and ecommerce apps as well as your accounting platform, you are ready to complete your account mapping to enable automated journal entry postings.
- From the Connections page, you can click "Map" next to each financial data sync you have turned on to complete the journal entry mapping. Below the ecommerce and deposit entries are set to ON:

- Once clicking "Map," you will see that some lines have a magic wand on the right side. This gives you the option to allow Bookkeep to create the account in your accounting platform if you do not already have an account:
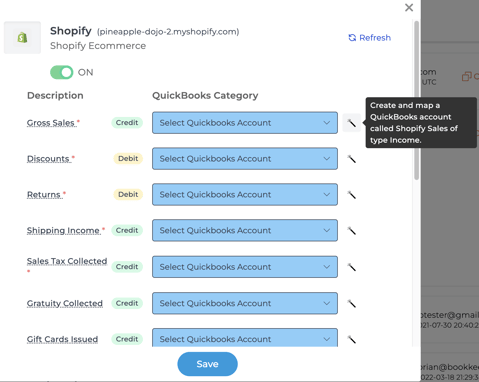
- If you choose to allow Bookkeep to create the account, Bookkeep will create the necessary account in your accounting platform and map to this new account for that specific line.
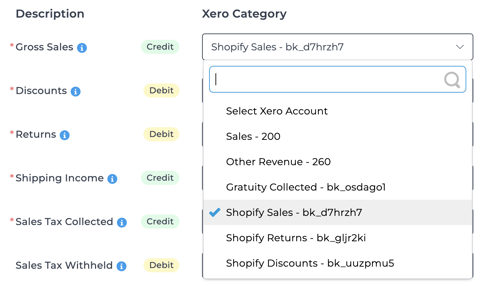
- Alternatively, if you choose to complete the mapping yourself, you can map each line of the journal entry to an existing account. For "Gross Sales" below, Shopify Sales is the account mapped from this accounting platform. If you have connected accounting, you will see your accounts available to map when clicking the dropdown for a line:
- From the Connections page, you can click "Map" next to each financial data sync you have turned on to complete the journal entry mapping. Below the ecommerce and deposit entries are set to ON:
- After completing the mapping for each entry that you have set to ON, you are ready to see Bookkeep's data sync save you time and enhance your data accuracy.
- If you set a journal entry to ON, this will fetch new financial data daily and post it to your connected accounting platform if everything is mapped. Otherwise, turning it to OFF will not pull any data into Bookkeep or your accounting platform.
- In addition to the account mapping mentioned above, there are settings for each app connection that allow you to customize your setup (located from the Connections view and clicking Configure as shown below):

- Specifically in settings, you should choose the time zone and end of day for your app connected. This is relevant as it will impact when the data will be fetched from your app:
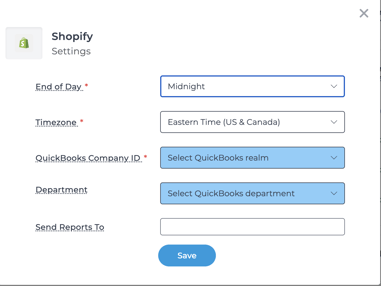
- Specifically in settings, you should choose the time zone and end of day for your app connected. This is relevant as it will impact when the data will be fetched from your app:
- Now that your apps and accounting platform have been connected and mapped, you are ready for financial data to begin syncing automatically. This will begin the next day! Bookkeep will post journal entries on a daily basis for the prior day's results to your accounting platform!
- If you have any questions, please contact support@bookkeep.com.