.svg)
Walk through of the steps to get Lightspeed up and running. Bookkeep supports the Lightspeed Retail POS (R-Series).
To begin utilizing Bookkeep's automated journal entries for Lightspeed, you must connect the Lightspeed account where you would like to import data. Below we will go step-by-step through the setup process to ensure you are ready to go!
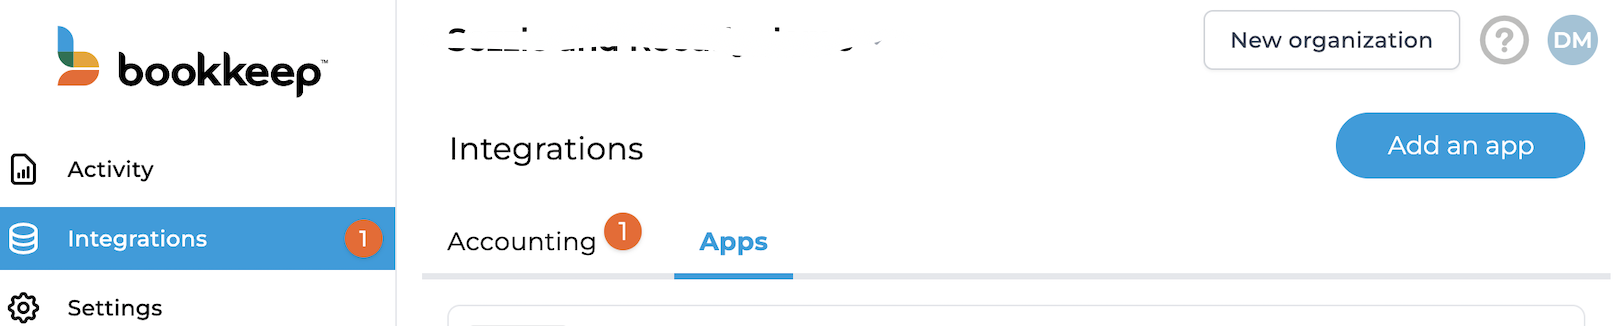
1. First connect your Lightspeed account by visiting the Integrations/Apps View and clicking "Add an App" as shown on the right side below.
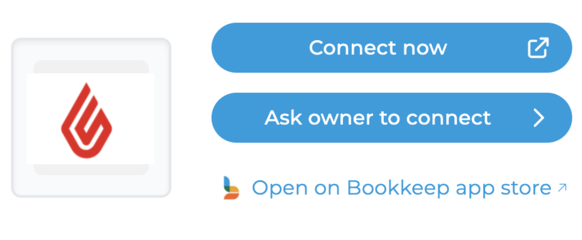
2. After locating and clicking on LightSpeed, a modal will appear with the ability to actually connect. We give you the option to invite the account owner to connect if you do not have the credentials (this will send the owner an email to connect LightSpeed). Otherwise, if you have the credentials, click "Connect Now."
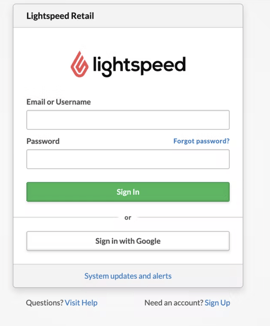
3. If you proceed with the immediate "Connect Now," a new window will open for you to log in to your LightSpeed account as shown below:
4. Once you have logged in to grant access to Bookkeep, you will see the LightSpeed account connected to Bookkeep in your Integrations:
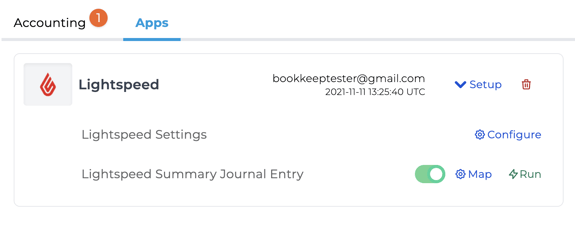
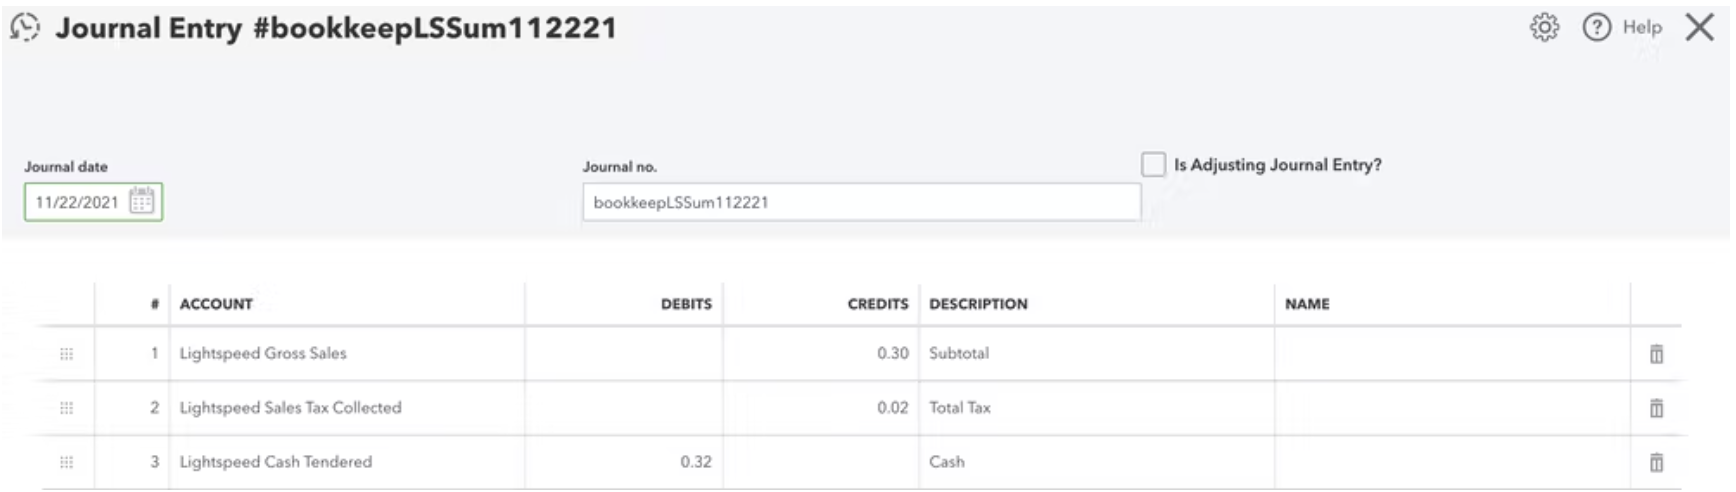
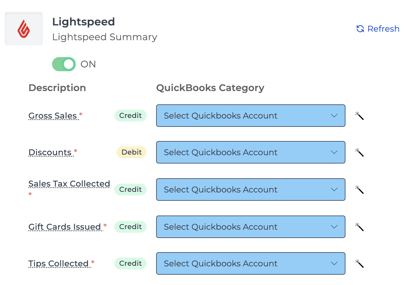
5. Now that your LightSpeed account is connected to Bookkeep, you will need to complete your mapping to the accounts from your Accounting Platform (e.g. QuickBooks Online, Xero) which can be found on the Integrations tab and clicking on "Setup" for LightSpeed. You can click into each journal entry's mapping that you plan to utilize and map each journal entry line to enable the posting. After completing the mappings, you can set each journal entry you need to ON. This will activate a daily journal entry for each journal entry template that is turned on. We offer a sales summary daily journal entry for LightSpeed. Additionally, you will need to complete the Settings as discussed in the next step.
6. From the Integrations/Apps view, you will see LightSpeed as connected. When clicking "Setup," you will see the LightSpeed Settings appear. You can click "Configure" to finish setup. In Settings, ensure that you select the correct time zone and end of day for the account that you have connected. This will impact when we complete the next journal entry and ensure we are retrieving the right sales data for that time period:

7. Once you have completed the settings and mapped the necessary journal entry templates with them set to ON, you are good to go! You will see journal entries begin posting to your accounting platform the next day!