.svg)
Walk through of the steps to get WooCommerce up and running with Bookkeep
WooCommerce is an ecommerce plugin for WordPress that powers millions of online stores. To begin utilizing Bookkeep's automated journal entries for WooCommerce, you must connect the WooCommerce store where you would like to import the data. Below we will go step-by-step through the setup process to ensure you are ready to go!
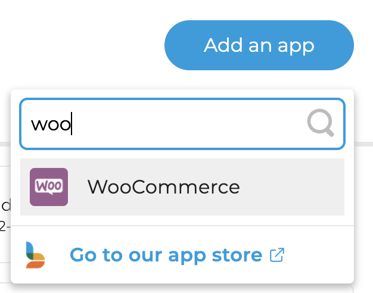
1. First connect your WooCommerce store by visiting the Connections/Apps View and clicking "Add an app" to search for WooCommerce:
2. Clicking on the WooCommerce icon will take you to the screen to actually connect. If you have the API keys, click "Connect Now" or you can invite the owner to connect: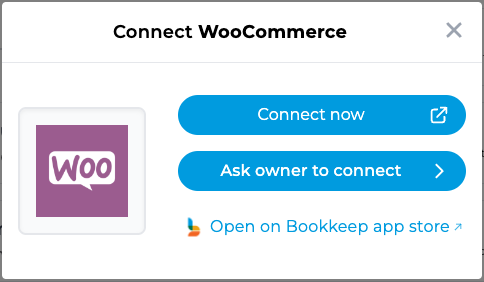
Please note that these API keys are retrieved from your WooCommerce account and will be discussed further below:
3. In order to proceed with the WooCommerce connection, you will need to retrieve your API keys that are provisioned from your WooCommerce store. Log into your WooCommerce store and visit the Dashboard. Hover on 'WooCommerce' in the left side navigation and click Settings.
4. Depending on which version of WooCommerce you are using, you will either see an "API" tab or an "Advanced" tab.
If you see the "API" tab, click on it and ensure the 'REST API' checkbox is enabled from the 'Settings' tab. Then, click 'Keys/Apps.'
If you see the "Advanced" tab, click on it and then visit the "REST API" tab to create an API Key.

5. Now it is time to create a new key called "Bookkeep" with Read permission.
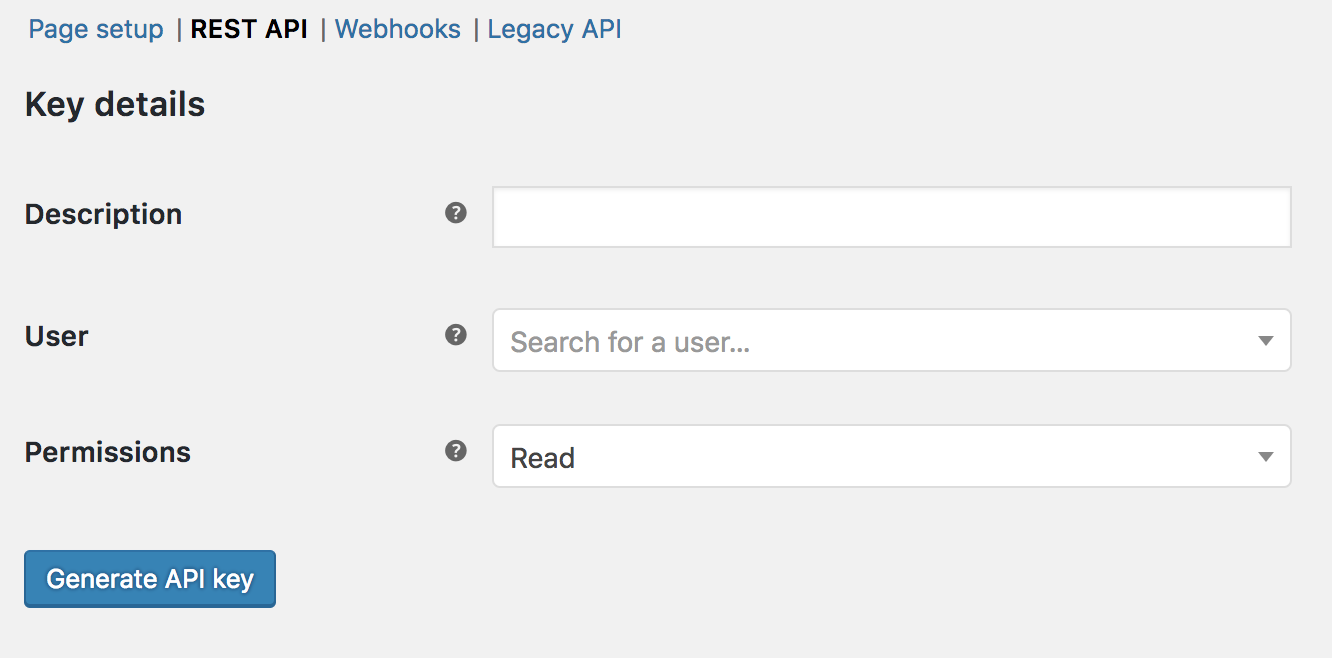
Once the keys have been generated, you should see Consumer Key and Consumer Secret keys.
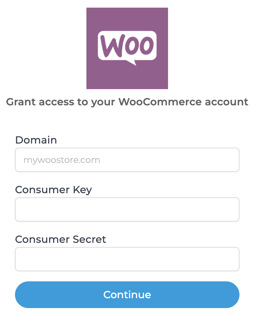
6. The Consumer Key and Consumer Secret can then be entered into the Bookkeep view (as shown below and in Step 2) with your URL in the form domain.com:
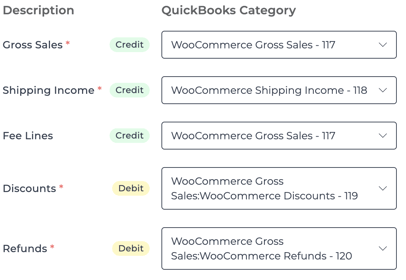
7. Now that your WooCommerce store is connected to Bookkeep, you will need to complete your mapping to the accounts from your Accounting Platform (e.g. QuickBooks Online) which can be found on the Connections tab and clicking on "setup" and then "map" for WooCommerce. After completing the mapping, you can set the journal entry to ON. This will trigger a daily sales summary based on order data from WooCommerce:
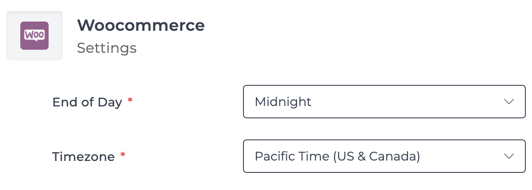
8. To complete the setup and ensure accuracy, you need to set the end of day and time zone for the store connected to ensure the correct order data is retrieved. This can be found on the Connections/Apps tab and clicking on "configure" for WooCommerce. This will open a popup where you can select the time zone and end of day.
9. Once you have completed the settings and mapped the sales summary journal entry template, you are good to go! You will see journal entries begin posting to your accounting platform the next day!