.svg)
How to complete the mapping of your source data into your accounts from your accounting platform
Once you have successfully connected both your accounting platform and ecommerce/POS apps to Bookkeep, the next step is to finalize your account mapping. This process is crucial as it enables daily automated journal entry postings, streamlining your financial data management. By mapping your accounts, you ensure that transactions from your apps are accurately categorized and recorded in your accounting system.
The account mapping feature in Bookkeep allows you to map each journal entry line to a specific account in your accounting platform. This ensures that data is posted correctly and consistently each day. You can easily create new accounts or select existing ones from a drop-down menu, simplifying the mapping process.
It is important to pay attention to the descriptions provided for each line to make informed decisions on which account to map it to. Additionally, Bookkeep offers the option to automatically create and map new accounts using the "magic wand" tool. This feature saves time and ensures that the created accounts align with your financial reporting needs.
Furthermore, you can customize your mapping settings based on your business requirements. Bookkeep allows for granular mapping options, giving you the flexibility to track specific categories or subcategories per line. This level of detail enhances the accuracy and relevance of your financial statements.
By completing the account mapping process for each connected app and configuring relevant settings, you set the stage for efficient data processing and reporting. Bookkeep's comprehensive mapping tools empower you to tailor your financial management system to suit your business needs effectively.
1. From the left navigation, click on the “Connections” link, which will display all of your currently connected apps (there are separate tabs to see the accounting connection as well as app connections). The "My apps" tab is where you will complete the mapping.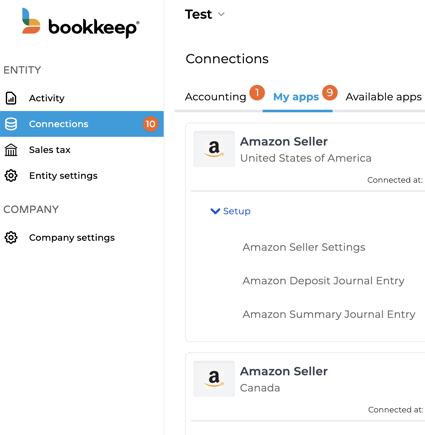
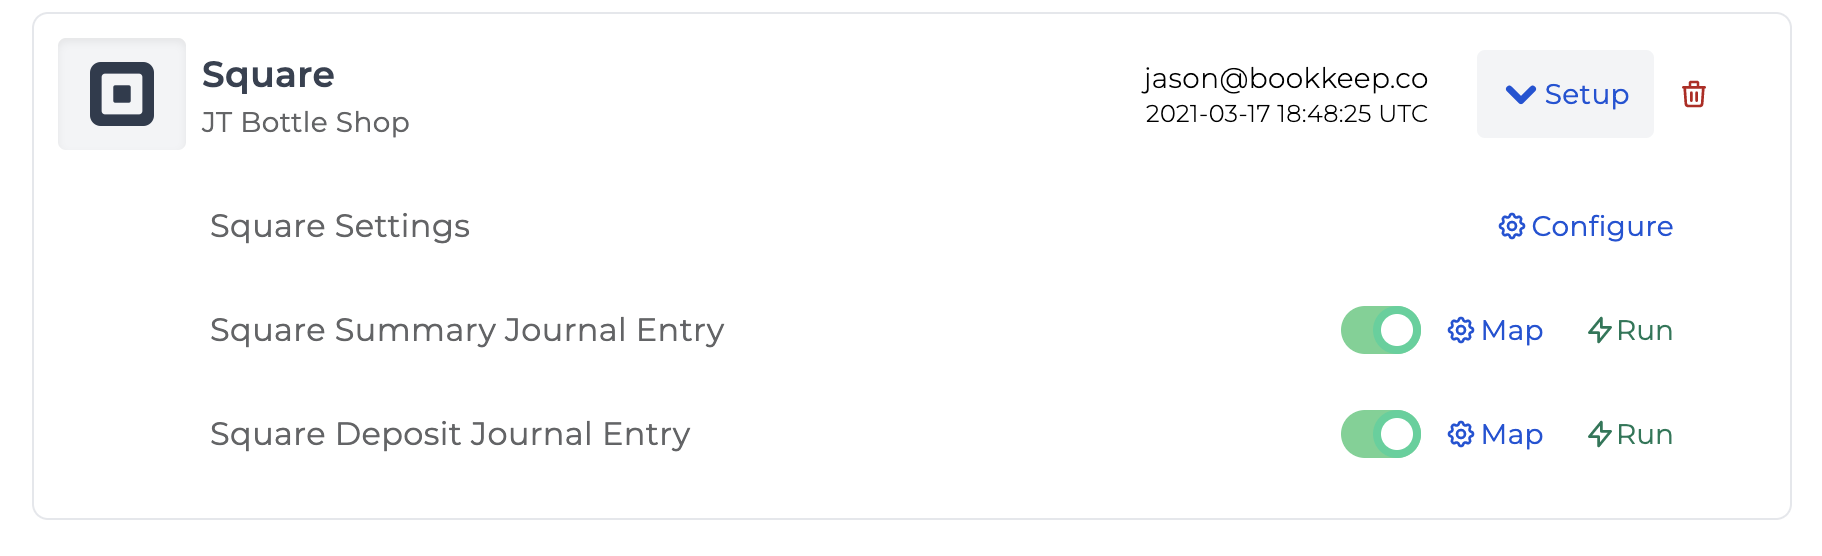
3. Clicking “Map” next to the specific journal entry will take you to the account mapping view, which is specific to each app connection and each journal entry type (sales summary, deposit, fees, etc.).
Note: Each template can be toggled ON or OFF, which controls if data will be posted to your accounting platform or not each day. In the image above, the slider is GREEN indicating that it is set to ON.
4. Within the mapping view, you can select each journal entry line and link it to an existing account from your chart of accounts using the blue dropdown menu. Alternatively, you can choose to create a new account automatically through Bookkeep by utilizing the magic wand tool located beside each line. This feature streamlines the process by generating a new account in your accounting platform specifically mapped to that line.
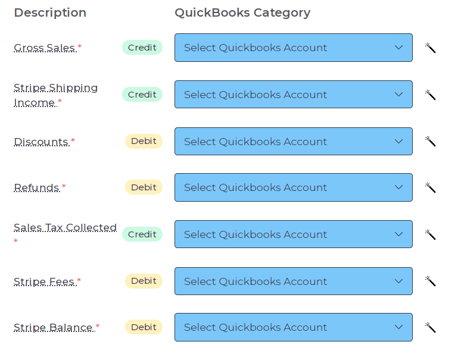
Note: In order to avoid mapping errors, the accounts available in the dropdown menu for mapping are limited to the most commonly used account types for that specific line, (e.g. bank deposits can be only mapped to bank type accounts, expenses can be mapped to either Expenses or Cost of Goods Sold type accounts, etc.)
When you hover your mouse over the "Description" field, a brief explanation will appear, showing what each specific line will contribute to the financial system from the connected app. This information can guide you in deciding which account to map it to.
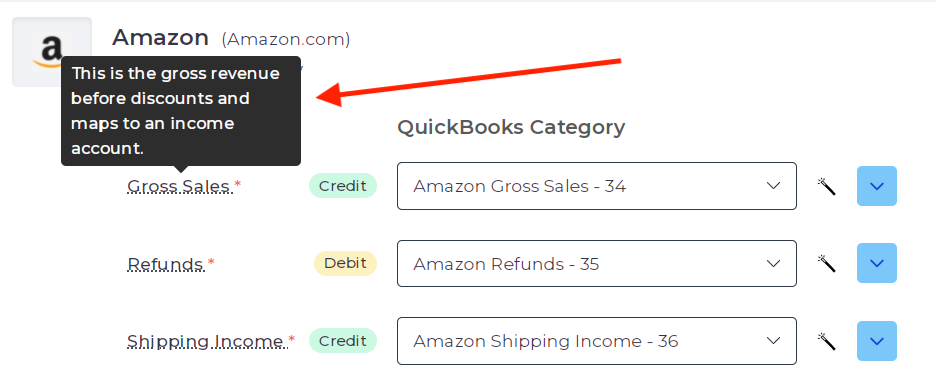
If you are just starting your business or you do not have all the accounts created in your accounting platform, you can quickly create and auto-map them from this view by using the “magic wand” displayed on the right side of the drop-down menu (the red arrow on the left is pointing to an example below). Again, before clicking the wand, you can hover over it to see the name and type of account that will be created in your accounting platform. 
Alternatively, you can always create accounts in your accounting platform prior to mapping, and come back to click "Refresh" (visible in the top right of the image above) to load these newly created accounts.
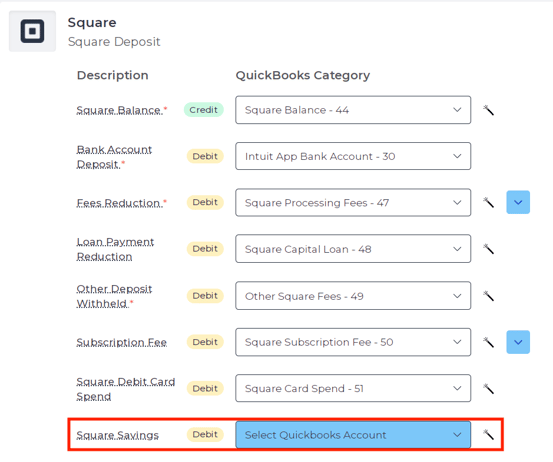
In some cases, specific lines are not mandatory to be mapped (these fields lack the red asterisk * next to their names), as it might not apply to your specific app connection. Only a line with the red asterisk * next to the name is a required line for you to post to accounting. If new financial data appears in a previously optional line, Bookkeep will mark that line as required. It will fail to post to accounting until that line is mapped to an account. For example, in the image below, Square Savings is optional for this customer and does not need to be mapped. However, if financial data begins appearing on the Square Savings line, it will be marked as required and not post into accounting until this line is mapped.
Note: you will have to repeat this mapping process for each journal entry you wish to automate for your connected apps.
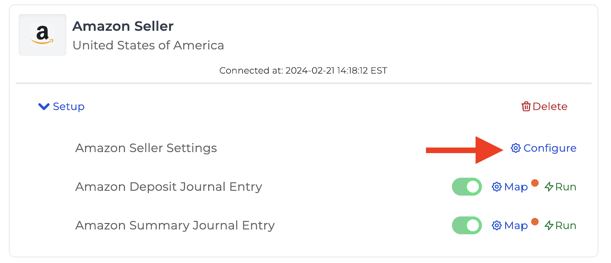
6. For each app connection, you will also need to ensure you complete the "Settings" that can be located from the Connections view as shown below by clicking "Configure":
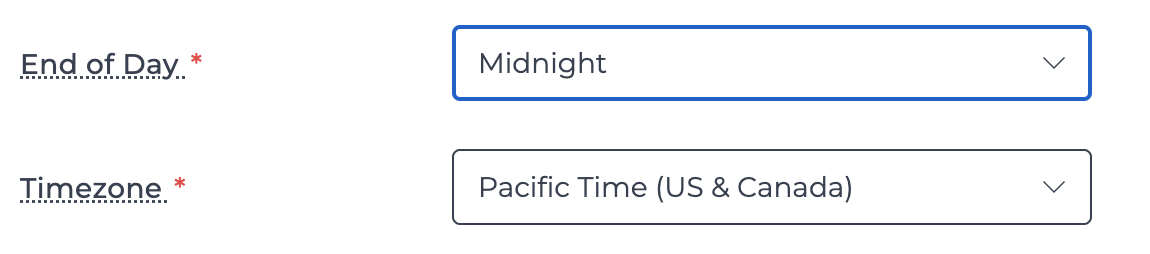
7. After clicking "Configure," you will see any relevant settings that need to be completed that will impact how and when Bookkeep pulls financial data from the connected ecommerce or POS app. For example, the fields end of day and timezone tell us the time period to pull data to ensure the reporting matches your connected app.
BONUS FEATURE: for many of our apps, we offer the option to map on a more granular level, depending on the source data we have access to. For example, for many apps, we populate product categories under gross sales and refunds to allow you to track your performance by product category.
It may take some time for this information to be populated from your source app before it becomes available for mapping when financial data is imported into Bookkeep. Bookkeep automatically fetches data from up to a 14-day period starting from when you connect your apps. As we conduct our daily financial sync, new subcategories will gradually appear. For instance, if a new product category is sold today, it will be ready for mapping under gross sales.
In the example below, the “Gross Sales” line for the Square Sales Summary is showing the product categories (as they are setup in Square) which allows you to map them to individual accounts in your chart of accounts: Food, Coffee, Alcohol Sales, etc. if you want that information reflected in your financial statements. The same granularity would be available for sales tax if you need mapping to separate liability accounts (NY sales tax, CA sales tax etc.)
This is not a mandatory process for mapping subcategories and any of the subcategories not mapped will be rolled up into the parent account, which allows you to pick and choose how you want to use this feature.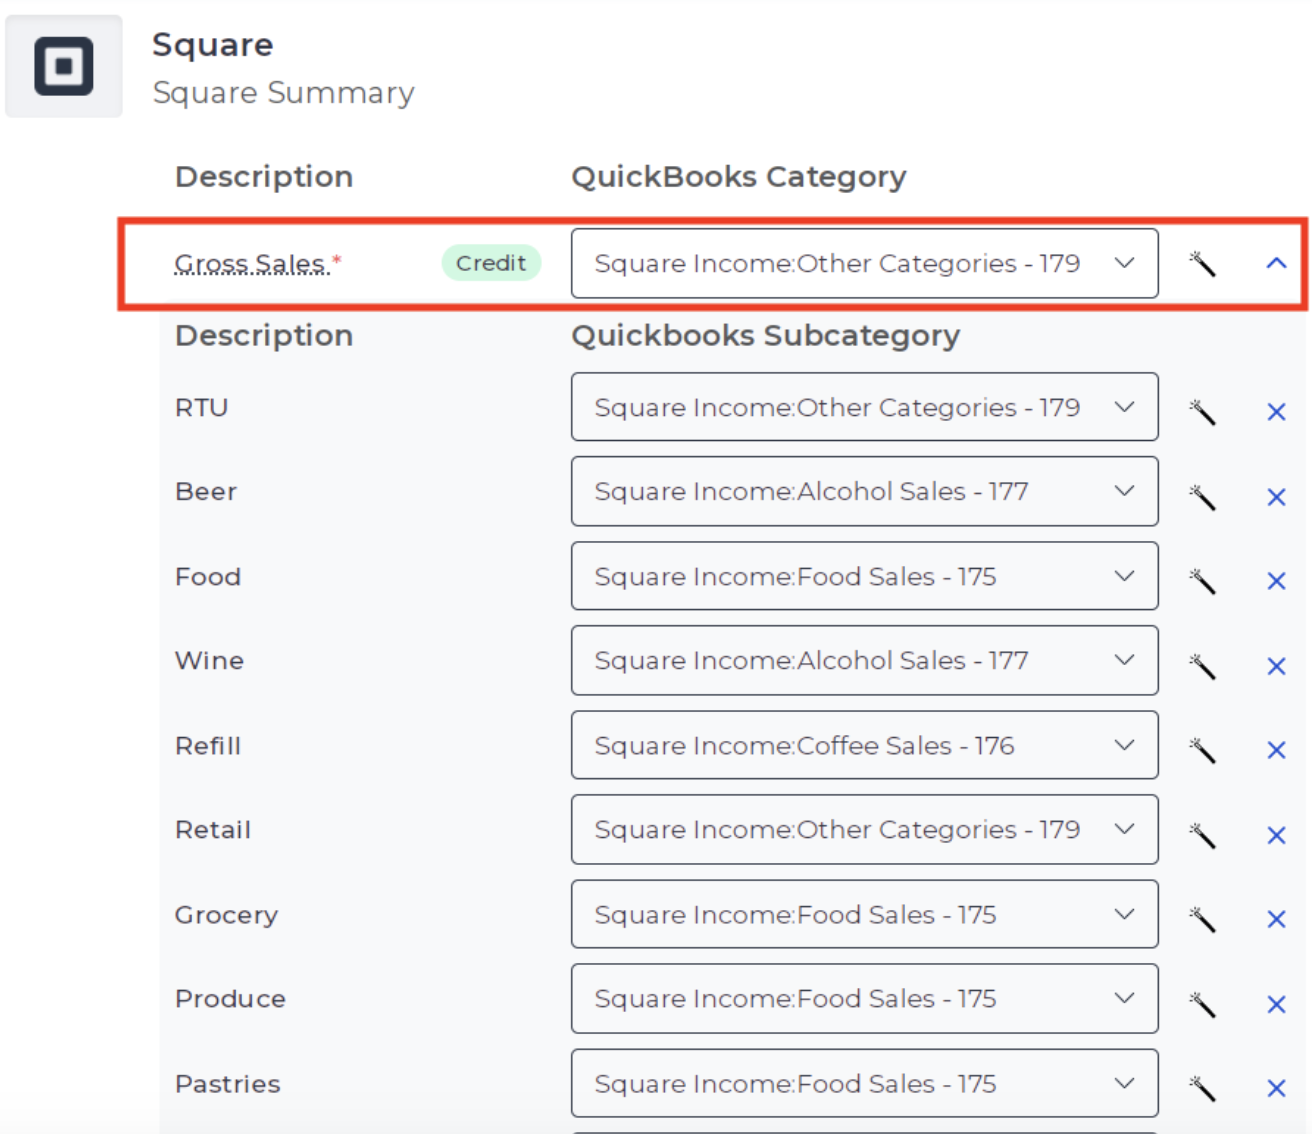
If you have any questions, feel free to contact support@bookkeep.com.