.svg)
Bookkeep posts automated journal entries to your accounting platform on a daily basis when you have turned the journal entries template to ON.
For select connectors (Shopify, Square, Squarespace) we allow users to map individual tax rates to match the tax rates in QuickBooks Online so filing for sales tax can be done accurately. This means that each individual tax rate will need to be fully mapped in your Sales Summary template for the journal entry to successfully post. As these tax rates can be added at any time based on your tax nexus (i.e. you might sell today to a brand-new jurisdiction you had no sales before) you will need to actively monitor this and add all new tax rates captured in your ecommerce app to your QuickBooks Online tax rates.
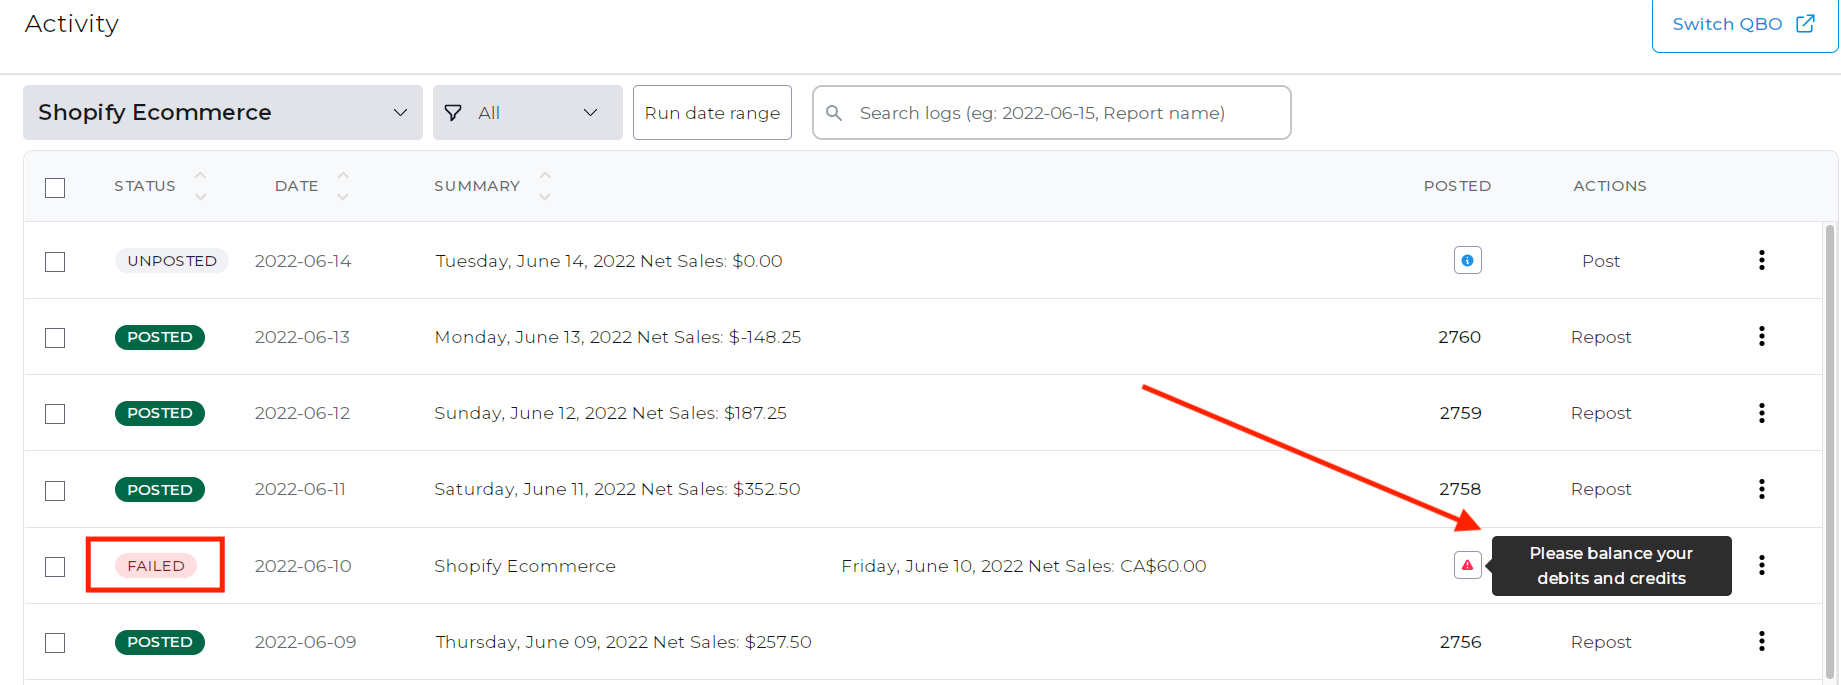
ISSUE: Any days where your system captured a new, un-mapped tax rate will show as “FAILED” in your activity log, and will display an error message stating “Please balance debits and credits” , as seen below:
FIX: go to Connections – Apps – Setup (for the relevant connected App) – then click Map for the Sales Summary template to open the mapping view.
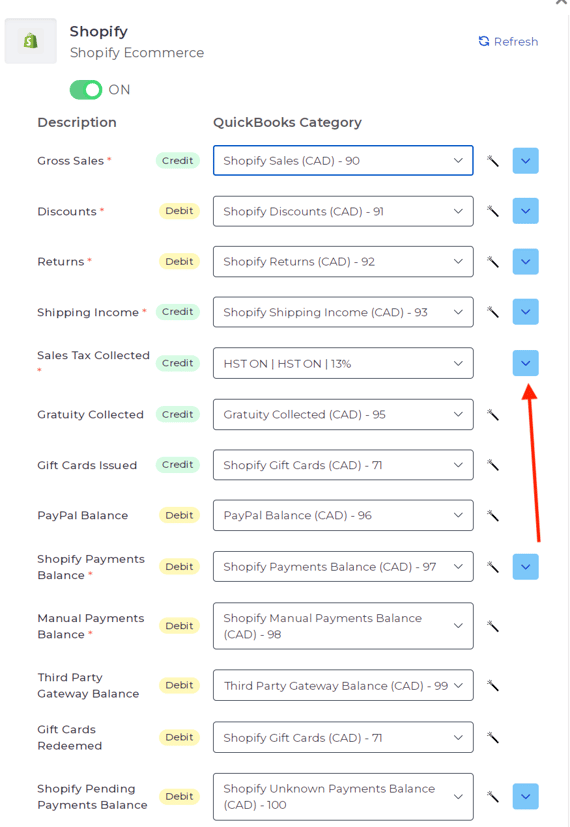
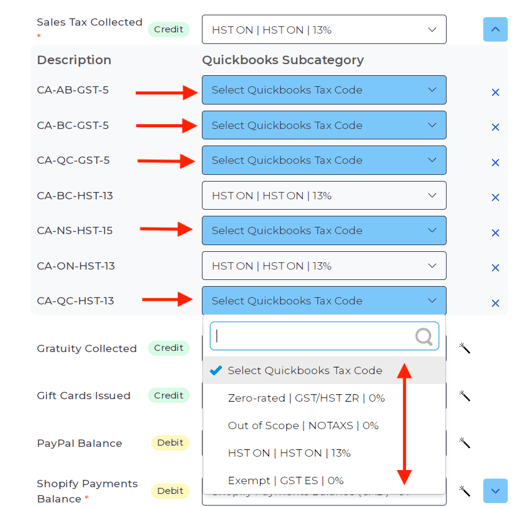
Click on the blue down arrow on the right-hand side of the “Sales Tax Collected” field to expand the view, revealing the different tax rates captured. Map any new un-mapped tax rates from the drop-down menu for each tax rate
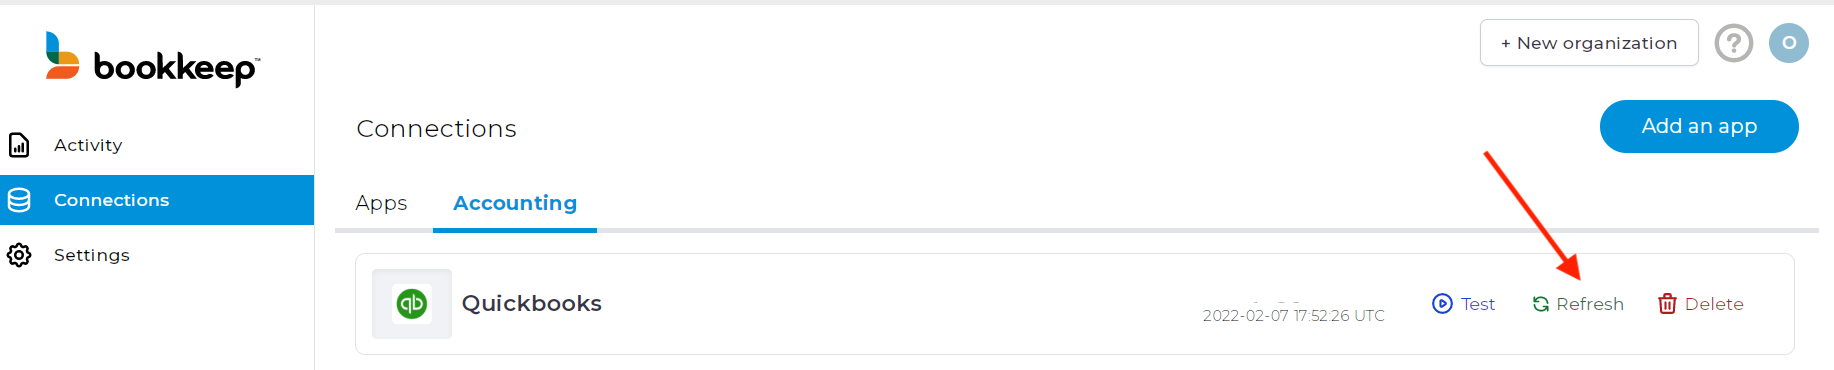
IMPORTANT NOTE: if your tax rate does not display in the drop-down menu for mapping, you will need to head to QuickBooks Online and create the correct tax rate there first, then come back to your Bookkeep dashboard, go to Connections – Accounting and Click “Refresh” to update your Bookkeep connection with the new changes (see below). After refreshing you can head back to the App mapping and complete the process for any missing, newly created tax rates.
Once the mapping has been completed, these changes will apply to all journal entries posted moving forward. To post any failed entries, head over to the activity tab and click “Post” to correct any “failed” entries that remain in the log.
If you need any help with completing your journal entry posting, please feel free to contact us!